TruBeautyGems: Eyebrows: Your Most Important Face Framing Tips
The best part about groomed eyebrows is that it tends to give you a more polished look. When my eyebrows aren't perfect, I always end up wearing more makeup to compensate for my wonky brows. But great brows can really make you look put together and can help your face look more symmetrical and beautiful.
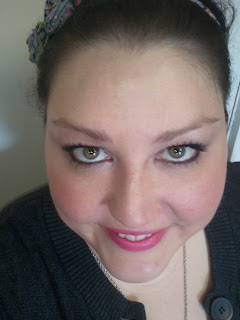
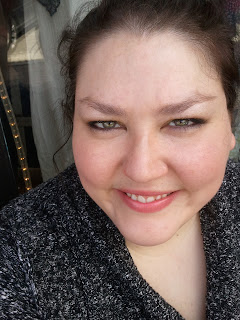
The following pictures are best viewed when you click on them to make them larger, so you can really zoom in on the eyebrow look we are featuring:
Thin
Medium
Medium penciled in
High arch, lengthen with eyebrow pencil
Bushier penciled in with ybf universal taupe eyebrow pencil
Bushier and straighter
Bushy
Here are some tips for choosing a kit and heating wax:
- DO NOT buy the kits that come with wax already on a strip that you are supposed to rub between your hands to warm up. They do not function as well as real wax that you heat up.
- When you buy a wax kit, make sure it's specifically designed for the face. If you buy a kit meant for waxing legs, the wax will probably not be suited for your sensitive skin on your eye area.
- Follow the directions very carefully, especially when it tells you how hot to heat up the wax, but use common sense. I recently bought a kit that said put it in the microwave for 3 minutes and it will be melted. Well, I put it in for 3 minutes and it was still hard as a rock. So, I continued putting it back in for 30 second increments until the wax had melted. Then I made sure to test the wax on my wrist to see how hot it was before putting it on my friend's eye area. Burnt wrist or burnt eye? I'd rather have a burnt wrist.
- Even if you put something in the microwave for only as long as the directions indicate, sometimes even that is too long. If wax comes out bubbling or boiling, do you think you should apply it to your eye area? Use some common sense.
- Exercise caution when using any method of heating wax. My mom and I used to wax our brows and heat up the wax in the microwave. One time we put the wax in and after only 10 seconds, the microwave shorted out. I was glad I wasn't standing there looking at it to see how fast it was melting. Keep your face away from the microwave! Now, when we heat wax we boil water on the stove and use a grill tongs to hold the wax container in the water (lid off) until we can see it melting. Use a way that works for you but don't be stupid, be careful. I'll admit we moved and even though I had a bad experience with the microwave last time I heated wax, I tried this microwave and it worked just fine. But I didn't put my face near it and I was very careful, only putting it in for 30 seconds at a time.
Application Techniques:
- Normally wax will come with a little tiny wooden stick that you can use to apply the wax. In my experience, usually the wax hardens on this and you can only really use it once before it's ruined. Keep some popsicle sticks in stock, they work just as well.
- If you are using a communal wax with other people, even if it's just friends or family, every time you dip into the wax, dip in with something different. I'm not saying your friends are dirty but it's simple to pass on an eye infection.
- Don't go over the same place twice with wax. If your skin is resistant to waxing, as it sometimes is during your period or while pregnant, it might be hard to pull the hair out. If you don't get the hair out the first time, tweeze instead.
- If you are using a kit that comes with muslin strips, and you run out, you can use magazine covers, chopped into strips. They work just as well!
- Remember, you can always take more hair off, but you can't go back if you accidentally took TOO MUCH off.
Other DIY Notes:
- If you are new to waxing, don't try it yourself for the first time. Go get it done at a salon so you are use to the way it feels when the strip comes off. If you do it yourself at home, you're going to have to be the one that pulls it off, and you don't want to be surprised by the pain the first time.
- Even if you are a DIY waxer all the time, every couple months, let a professional do it. I like to make sure I have a good arch to follow when I wax my strays.
- If you have a unibrow, you should definitely wax the center area above your nose and between your brows. Just make sure that you are aware of where you want your brow to start. If you need to, put a mark with eyeliner where you want to be sure to stop waxing so you don't end up with brows that don't start until the middle of your eye.
- Avoid putting lots of lotions or masks on your face right after a wax. I like to prep my brows with a toner, witch hazel, or something that takes the makeup off of that area quickly. After a wax, I usually use the mild calming lotion that comes in the kit. Try to keep makeup, acne products, or anything else harsh away from that skin for at least 2 days just to give it a rest. You don't need a rash!
Yours in Beauty,
Justina and Jessica


Post a Comment